Optional check in due on Wednesday April 3 (Week 1) at 11:59 PM
In this class, we’ll be using R and RStudio to code up our statistical analyses. Walk through these steps to make sure you have both programs on your computer and that everything is working properly. You need to make sure these tasks are completed before workshop on Thursday.
Everyone needs to do tasks 1 - 7. If you want to submit the optional check-in for Caitlin/An to verify that you’ve done things correctly, you can do task 8 and submit your screenshot on Canvas.
If you do not have R, RStudio, and Quarto installed and running, we cannot stop for you. Do this before class starts!
Task 1. Install R, RStudio, and Quarto
If you already have both things installed, great. If not, follow these instructions:
If you cannot install Quarto on your computer (because it doesn’t work with your operating system, etc.), that is fine - you just might have some differences between what we do in class and what you see on your own computer.
You may want to update your R and RStudio version if you haven’t used either in the last year or so. If not, some of the packages we use in the class might not work with your set up.
Task 2. Open RStudio
When we say we’re “using R” in the class, what we’re really using is RStudio, which is a graphical user interface (GUI) for R (the language). Basically, we’re never going to open up “R”, but we’ll always open up “RStudio”.
Open RStudio on your computer.
Task 3. Change your workspace save settings
When you’re using RStudio, you’ll get the option to “save your workspace” if you close out of the program. We’re going to make sure you don’t do that, because we want to make sure our code runs independently of any old information that was saved on your computer from RStudio.
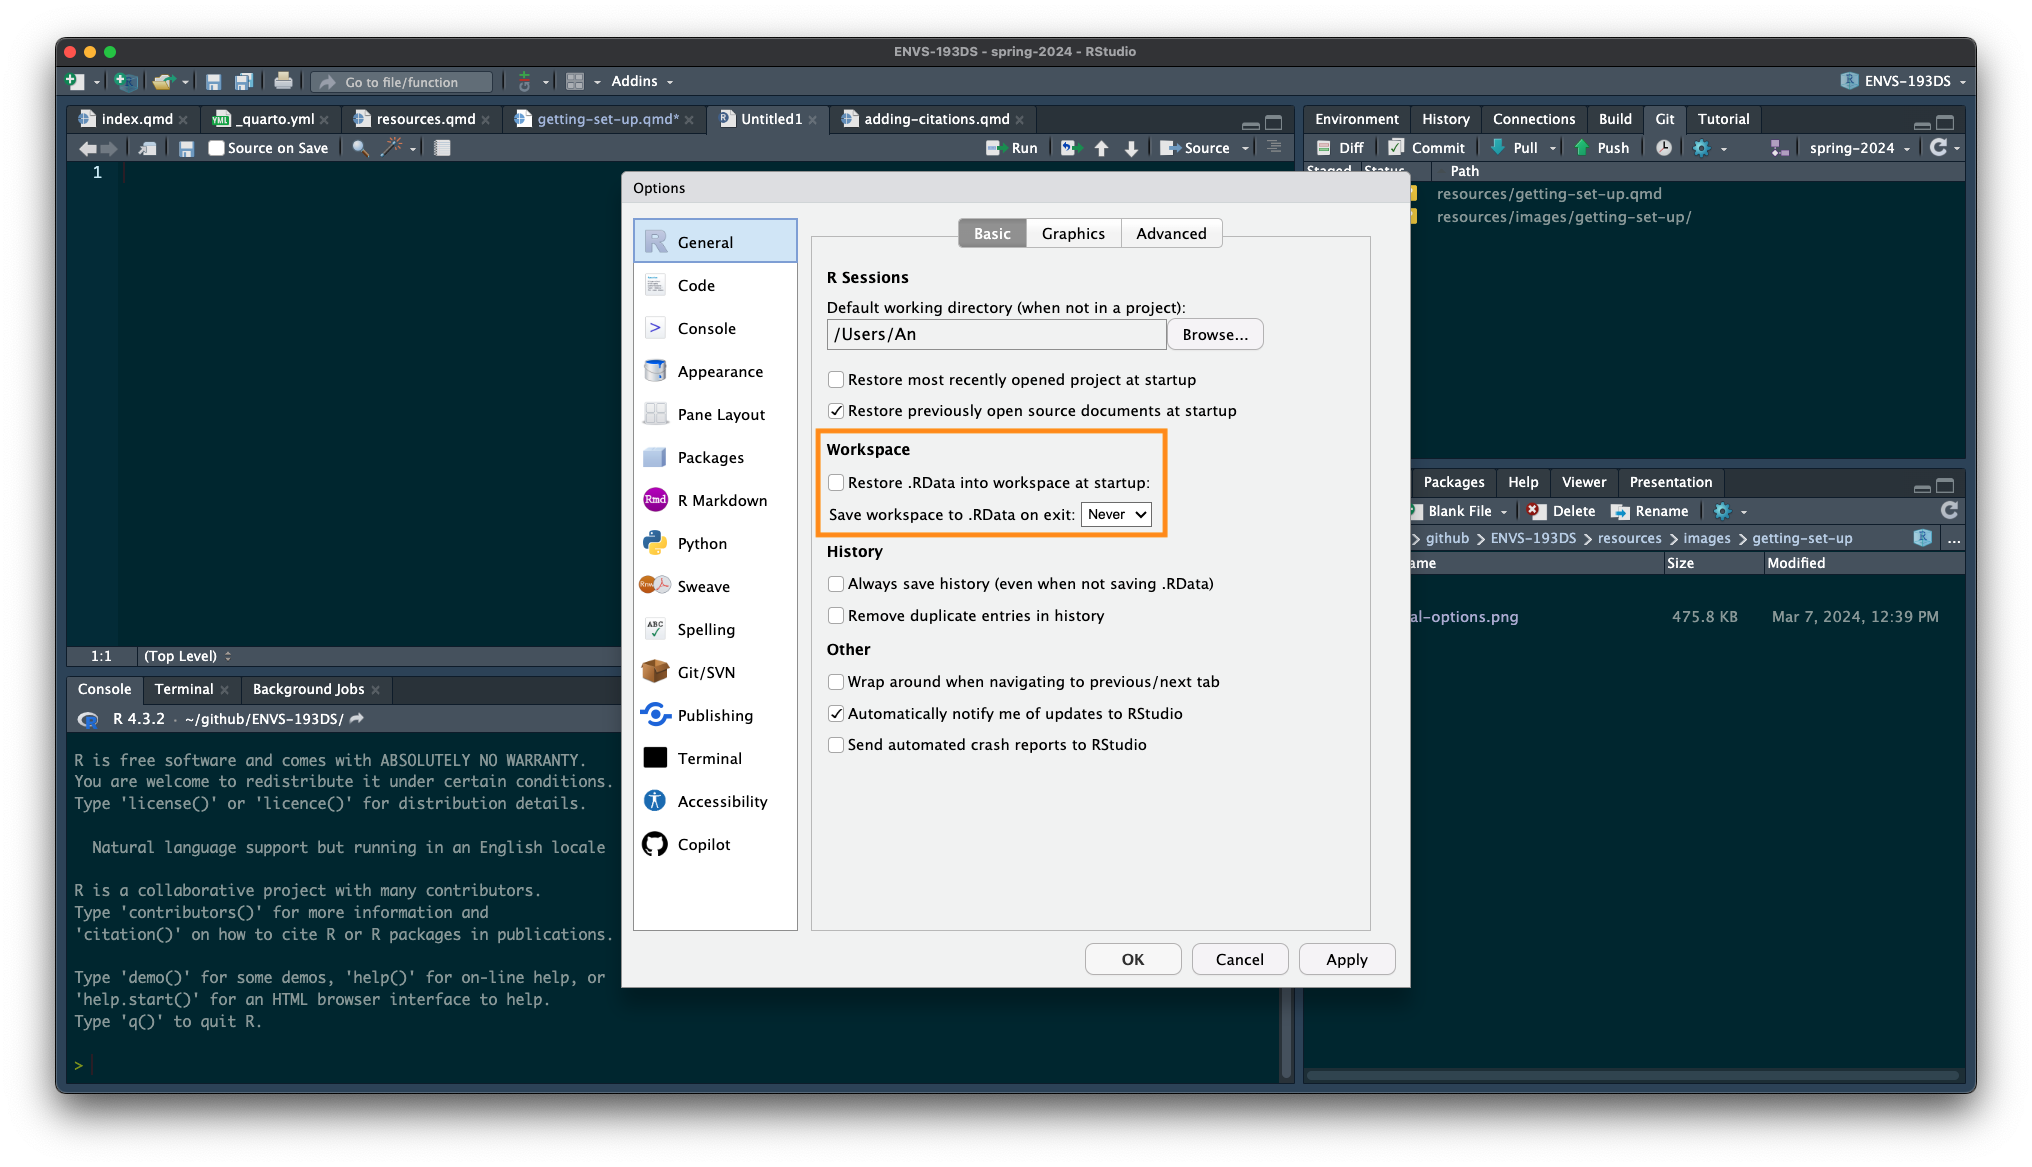
Go to Tools > Global Options > General and make sure that:
- “Restore .Rdata into workspace at startup” is unchecked
- “Save workspace to .RData on exit” is on “Never”
Hit “Apply”.
Task 4. Change your color scheme
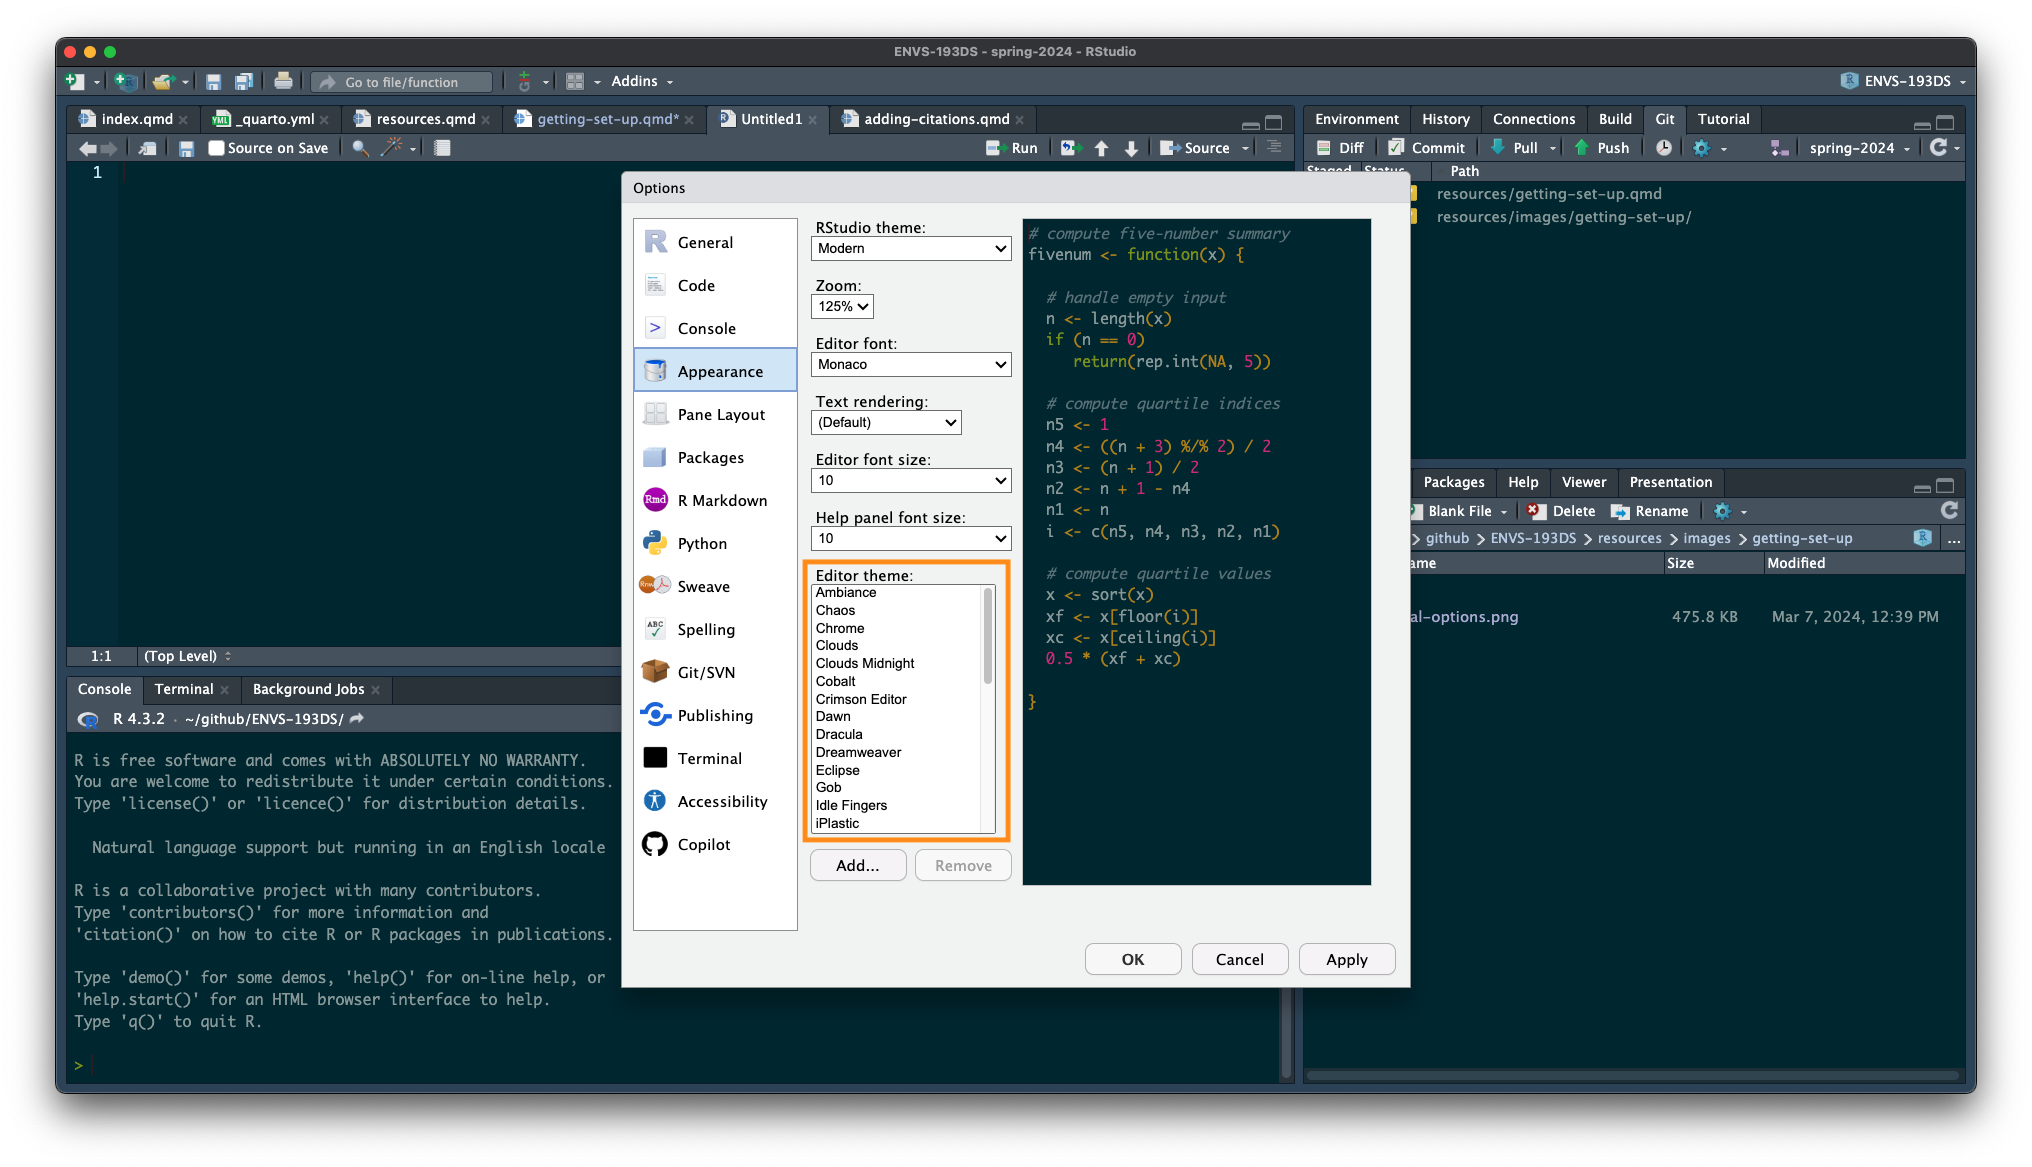
You don’t have to stick with the boring RStudio color scheme! Go to Appearance (from Tools > Global Options) and choose an Editor Theme. Hit “Apply” to save it.
Task 5. Test out installing a package
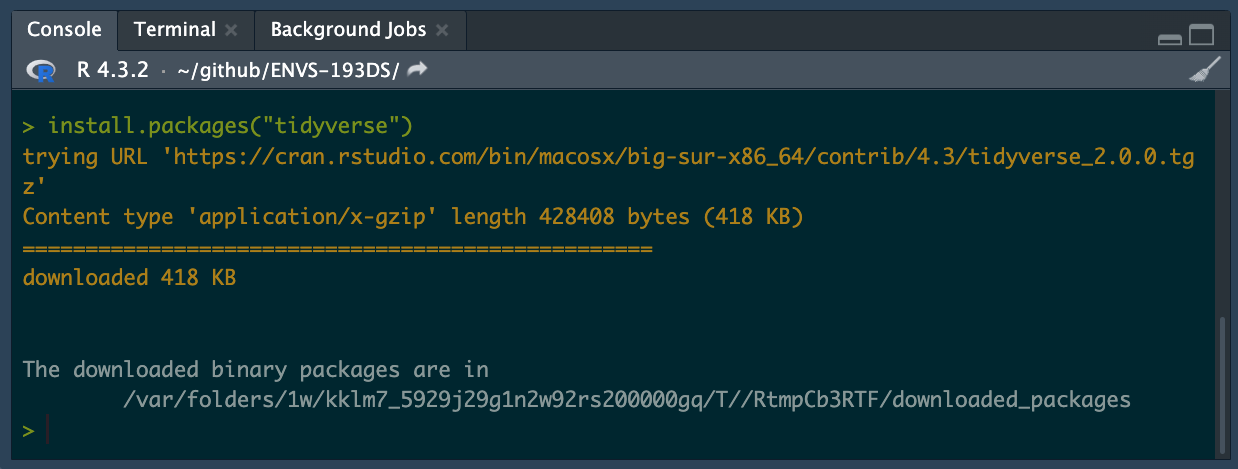
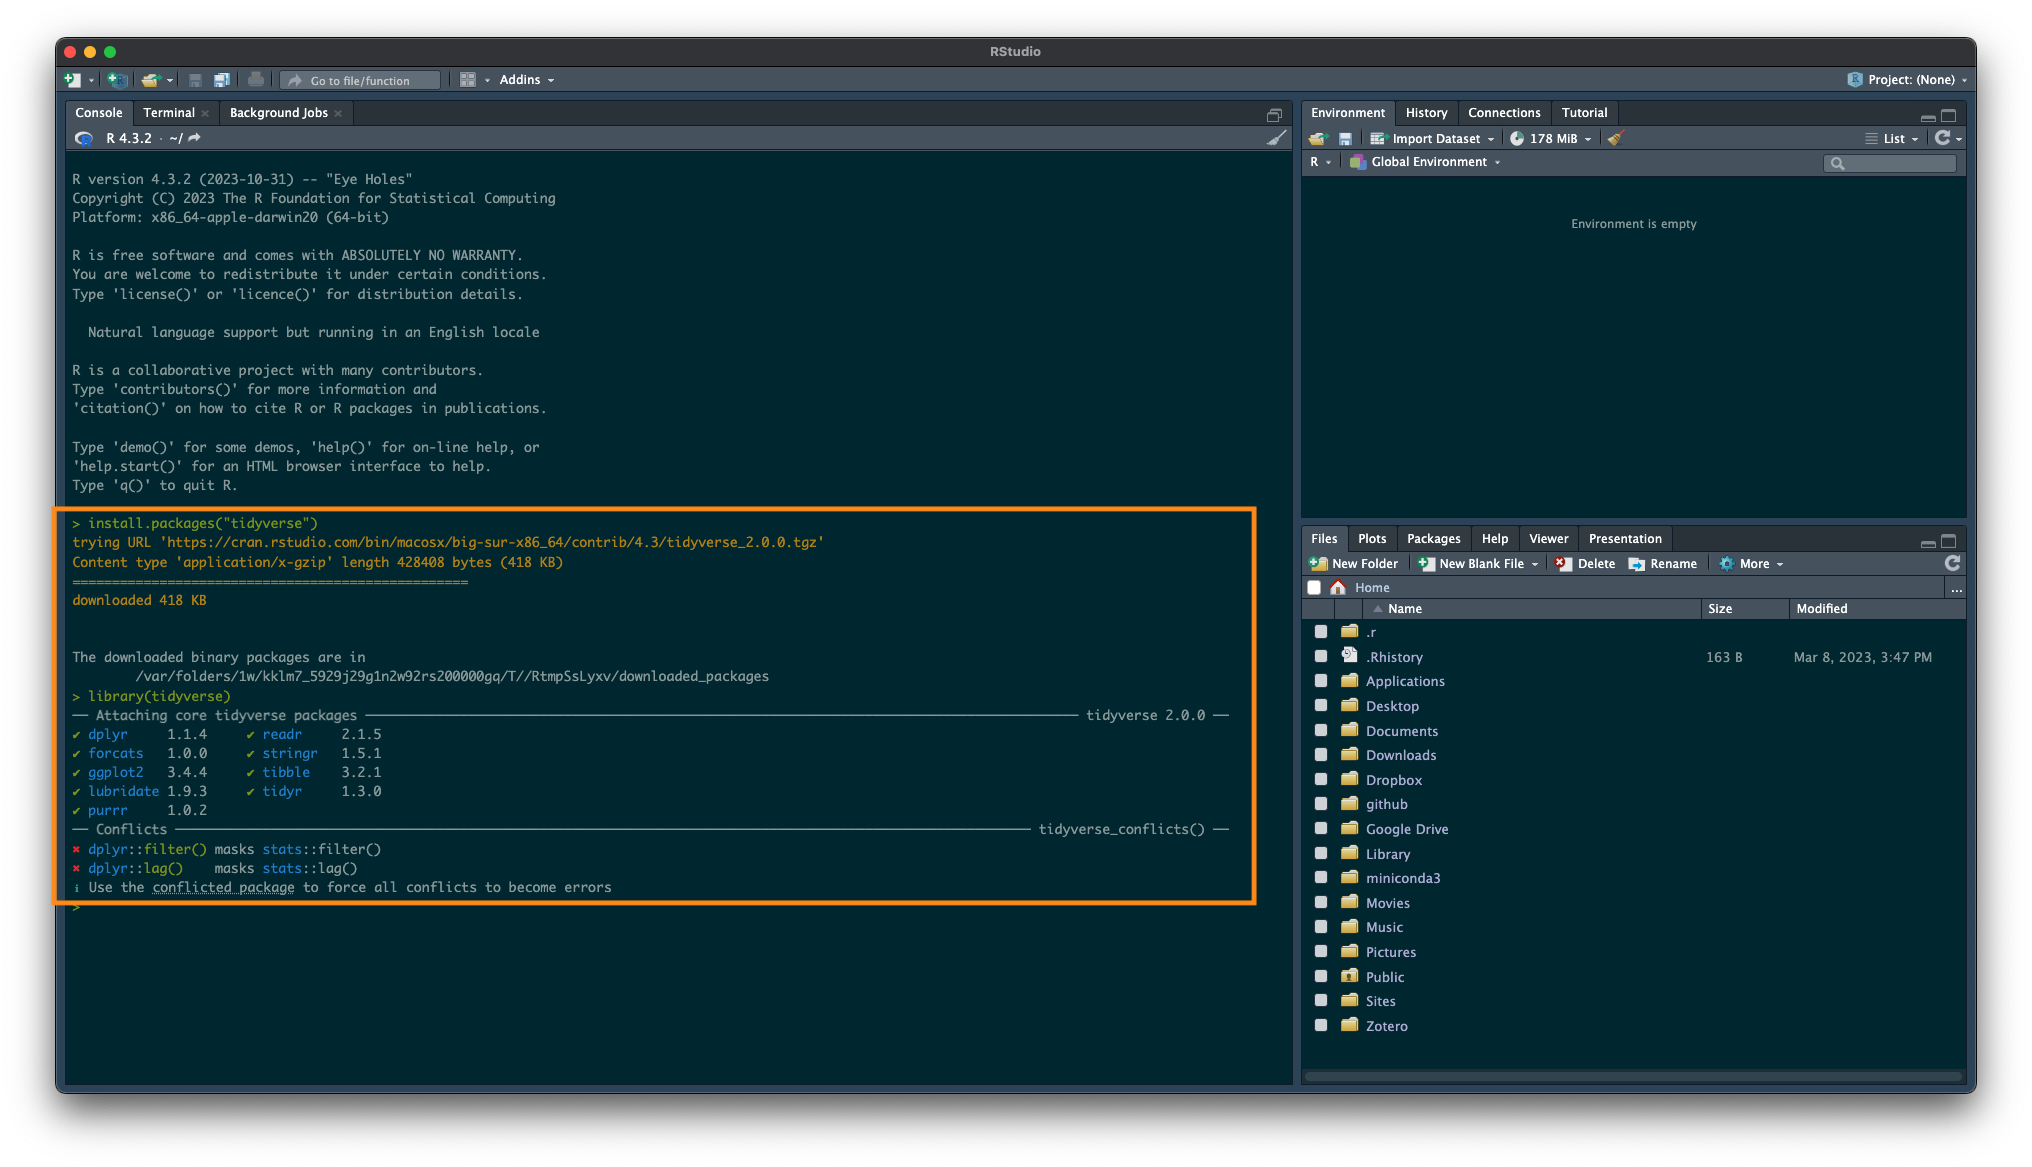
Packages are the best part of using R. We’ll talk more about what packages are in workshop, but for now try installing a package. Go to your Console (the bottom left pane in the RStudio window), and type (or copy paste) install.packages("tidyverse"). Hit Enter.
You should get a message that looks something like this:
The database that holds all these packages will automatically detect which version you need based on your operating system. Don’t worry if your output message doesn’t look exactly the same as the one here - just as long as you get something like “The downloaded binary packages are in…”, you’ve probably got the package installed.
Task 6. Test out reading in a package
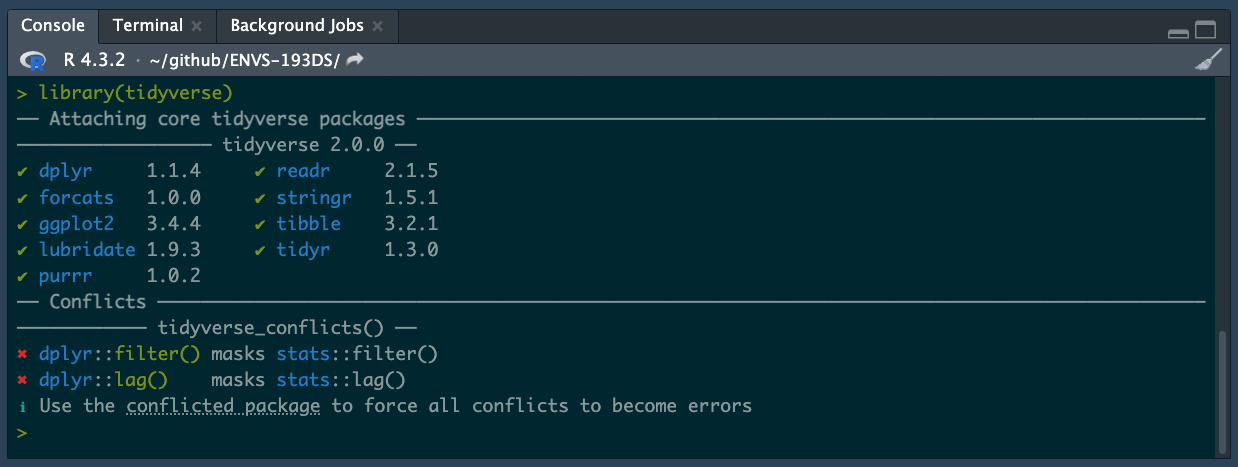
Now you’ve installed a package, but you want to make sure you can actually run it. Again in the Console (the bottom left pane), type library(tidyverse) and hit Enter.
You should get a message that looks something like this:
Task 7. Set up a folder on your computer for class materials
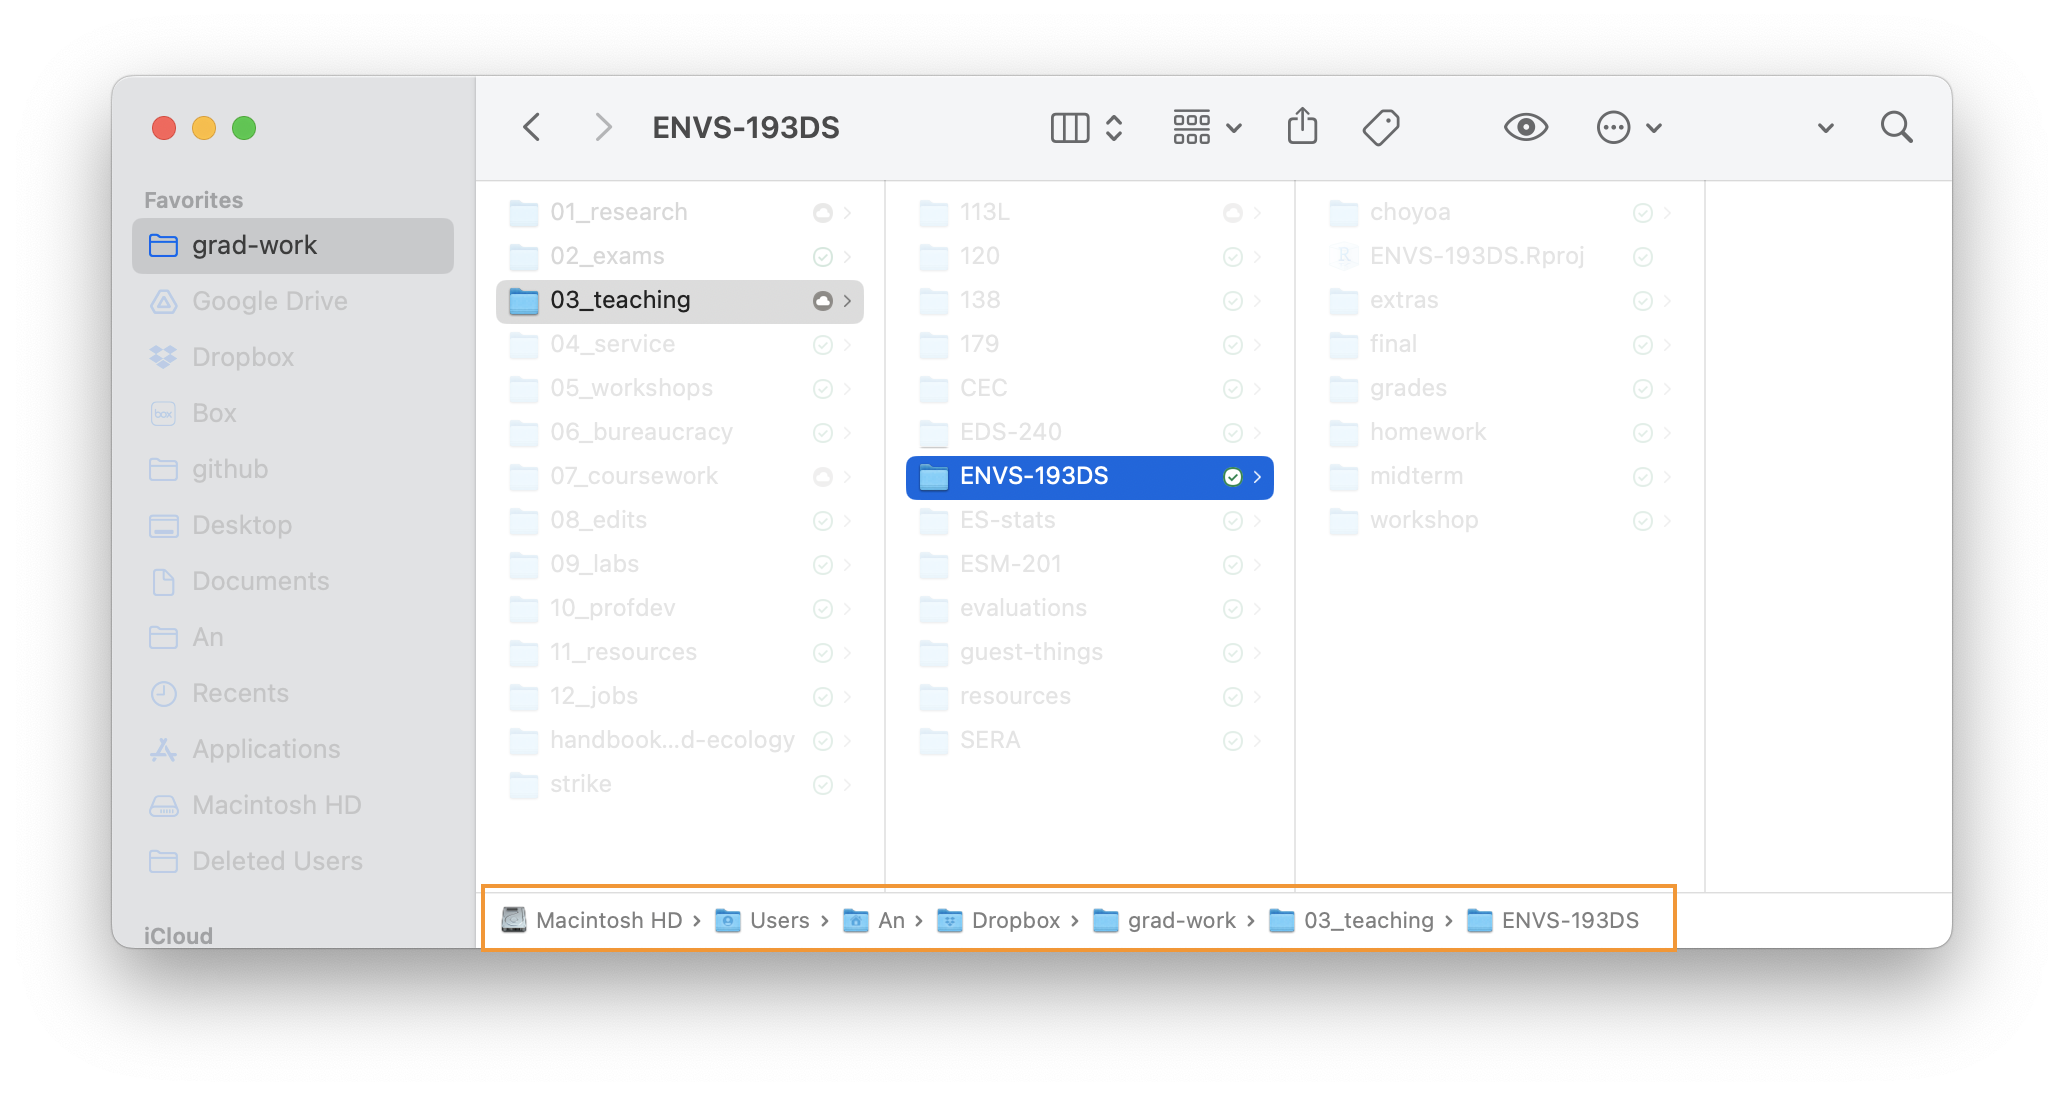
Using R/RStudio requires you to know how your computer is organized and where your files are. For now, we’ll want to set up a folder in your computer called ENVS-193DS (note no spaces in the folder name).
All operating systems are different, but make sure that your folder is not in the “iCloud” or “Google Drive” folders in your computer. Basically, you want to be sure that you can get from your “root” directory (i.e. your actual computer hard drive) to the folder you’re using.
You can check this using the file path, or the folders you would need to open to get to the folder called ENVS-193DS. One example for MacOS is below, where the file path is written out at the bottom of the pane:
Task 8. Take a screenshot of your RStudio set up
So that the instructors can verify that you’ve gotten everything set up, take a screenshot of your RStudio window with the code for install.packages("tidyverse") and library(tidyverse) in your Console and submit it to the portal on Canvas. Your screenshot should look something like this:
Make sure that the messages in the orange box (above) are visible in your screenshot! Otherwise we will not be able to troubleshoot whatever issues you are having with installation (if you are actually having any).
